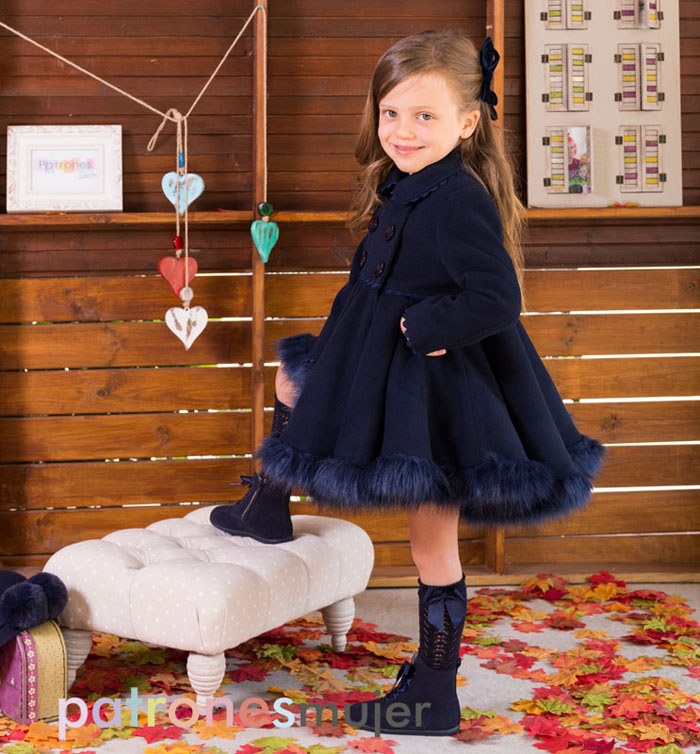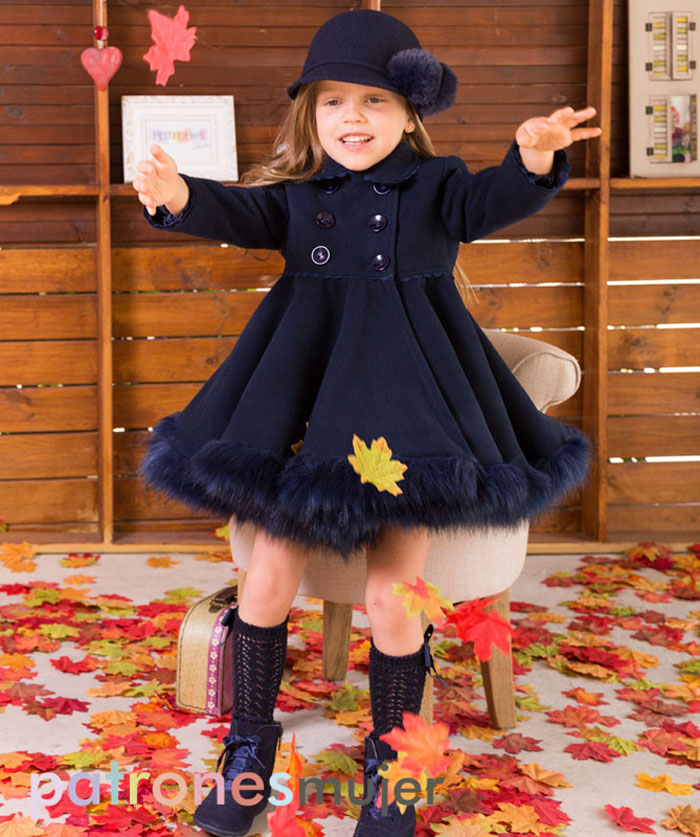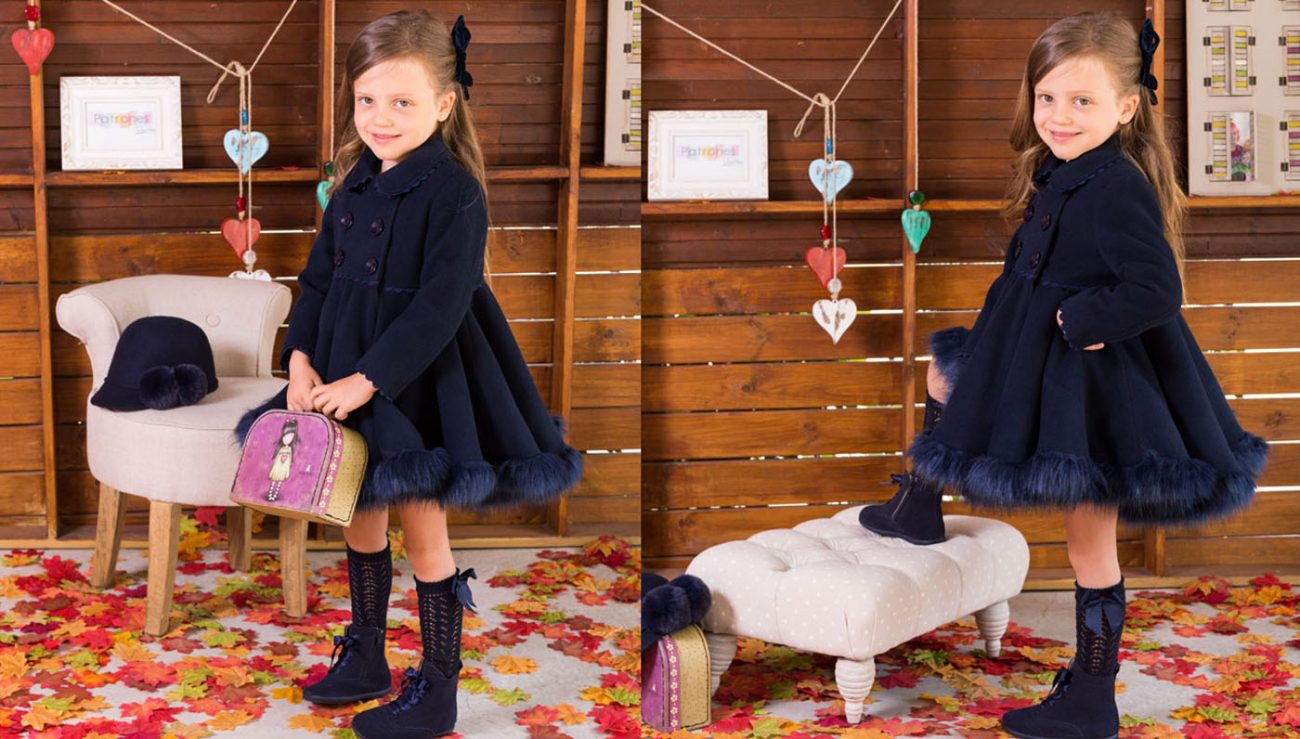
CONSEJOS
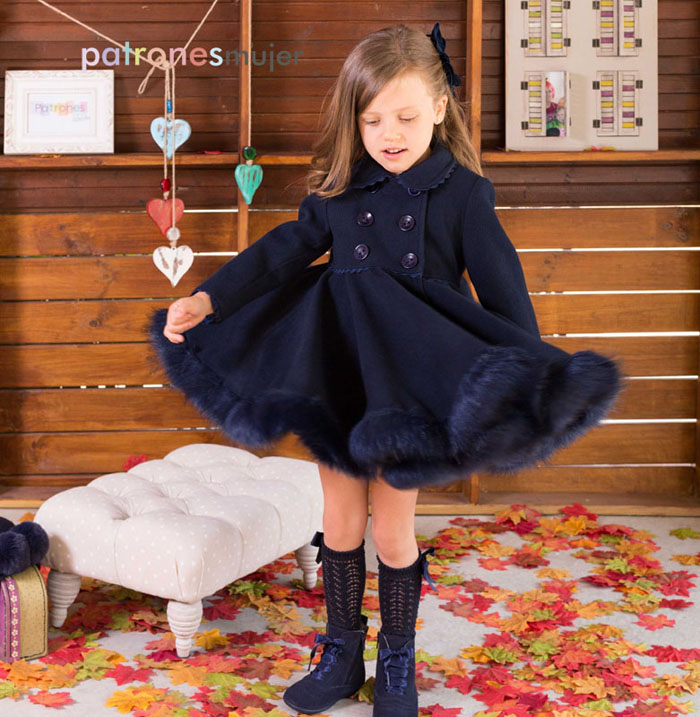
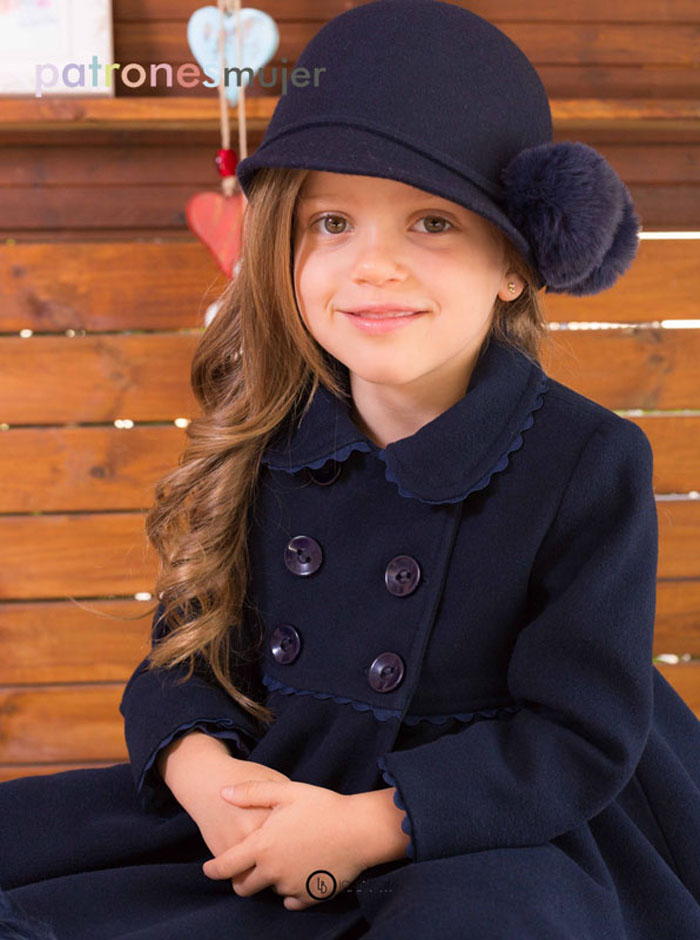
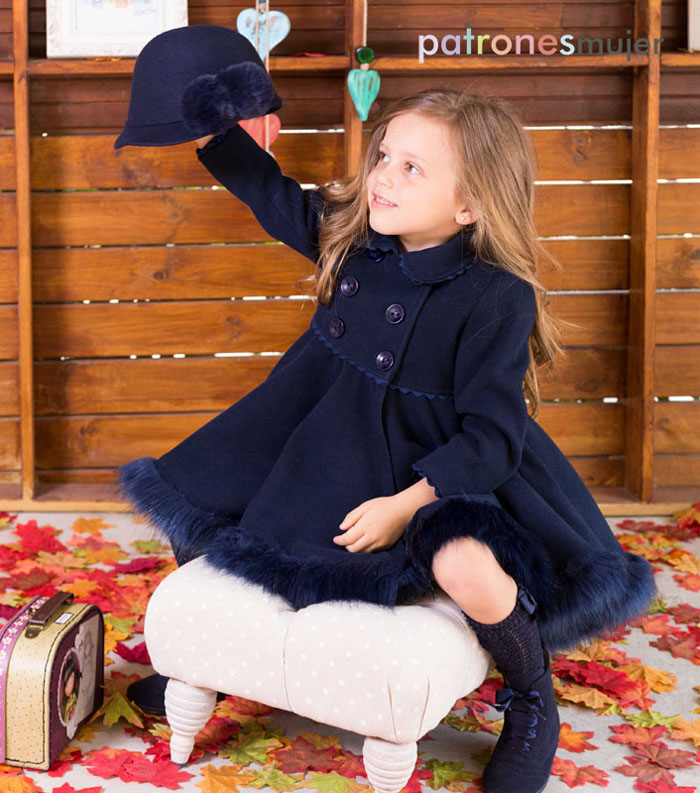
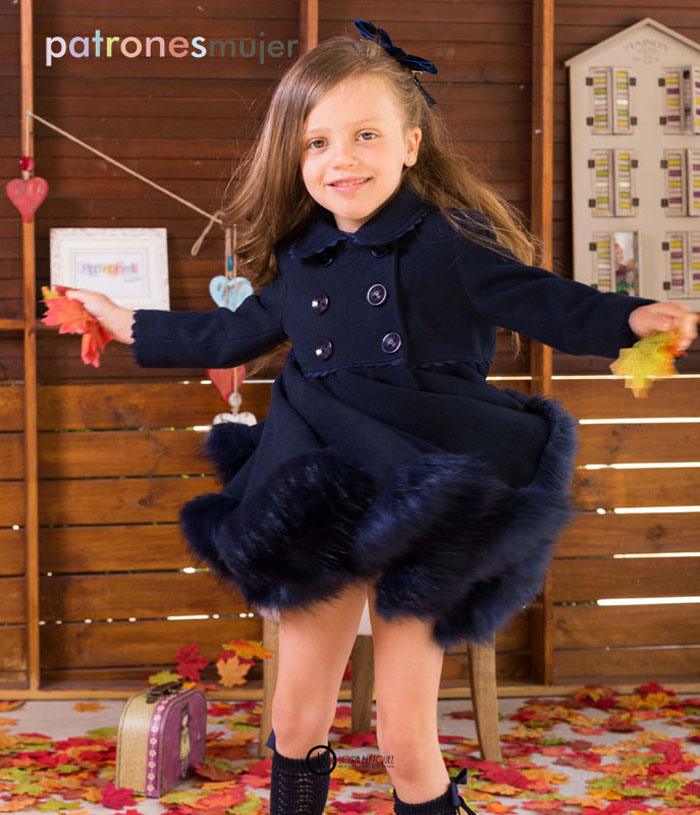
– Los tejidos recomendados para hacer el abrigo son: Paño y muflón. El forro es de acetato.
– Está en las tallas de 1 año a 7 años.
– Dificultad: Alta.
TIPS
– Recommended fabrics for the coat are wool and mouflon. The lining is acetate.
– Available in sizes 1 to 7 years.
– Difficulty: High
VIDEO TUTORIAL
MATERIALES/MATERIALS
Género cuadros/Checkered fabric:
1,30 m para talla 1-2 años/1,30 m for size 1-2 years
1,45 m para tallas 3-4 años/1,45 m for size 3-4 years
1,90 m para tallas 5-6 años/1,90 m for sizes 5-6 years
2,20 m para talla 7 años/2,20 m for size 7 years
Forro/lining:
1 m para talla 1-2 años/1 m for size 1-2 years
1,20 m para tallas 3-4 años/1,20 m for size 3-4 years
1,75 m para tallas 5-6 años/1,75 m for sizes 5-6 years
2 m para talla 7 años/2 m for size 7 years
Entretela/Interfacing:
60 cm para talla 1-2 años/60 cm for size 1-2 years
65 cm para tallas 3-4 años/65 cm for size 3-4 years
70 cm para tallas 5-6 años/70 cm for sizes 5-6 years
75 cm para talla 7 años/75 cm for size 7 years
Pasamanería de Pelo/Fur:
4,35 m para talla 1-2 años/4,35 m for size 1-2 years
5 m para tallas 3-4 años/5 m for size 3-4 years
6 m para tallas 5-6 años/6 m for sizes 5-6 years
6,40 m para talla 7 años/6,40 m for size 7 years
Botones/Buttons: 6
Picunela/Ric rac: 2 m
2 Hombreras/2 shoulder pads
Hilo/Thread,tijeras/scissors y alfileres/pins.
PATRÓN:
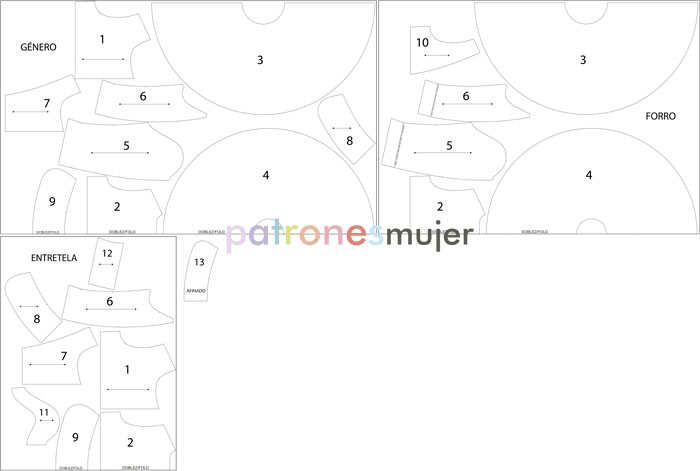
INSTRUCCIONES DE CORTE:
– La pieza 1 es el delantero, cortar 2 veces de género y 2 de entretela (encarados).
– La pieza 2 es la espalda, cortar 1 vez de género y 1 de forro (el patrón está a la mitad).
– La pieza 3 es la falda del delantero, cortar 2 veces de género y 2 de forro (encarados).
– La pieza 4 es la falda de la espalda, cortar 1 vez de género y 1 de forro (el patrón está a la mitad).
– La pieza 5 es la manga alta, cortar 2 veces de género y 2 de forro (encarados). Para sacar el forro cortar por la línea del bajo.
– La pieza 6 es la manga baja, cortar 2 veces de género, 2 de forro y 2 de entretela (encarados). Para sacar el forro cortar por la línea del bajo.
– La pieza 7 es la vista del delantero, cortar 2 veces de género y 2 de entretela (encarados).
– La pieza 8 es el cuello, cortar 2 veces de género y 2 de entretela (encarados).
– La pieza 9 es la tapa cuello, cortar 1 vez de género y 1 de entretela (el patrón está a la mitad).
– La pieza 10 es el forro delantero, cortar 2 veces de forro (encarados).
– La pieza 11 es la corona de la manga, cortar 2 veces de entretela (encarados).
– La pieza 12 es el bajo de la manga, cortar 2 veces de entretela (encarados).
– La pieza 13 es el afinado del cuello, cortar en papel o cartón.
CUTTING INSTRUCTIONS:
– Piece number 1 is the front. Cut 2 (1 mirrored) from main fabric and 2 (1 mirrored) from lining.
– Piece number 2 is the back. Cut 1 from main fabric and 1 from lining, on the fold.
– Piece number 3 is the front skirt. Cut 2 (1 mirrored) from main fabric and 2 (1 mirrored) from lining.
– Piece number 4 is the back skirt. Cut 1 from main fabric and 1 from lining, on the fold.
– Piece number 5 is the outer sleeve. Cut 2 (one mirrored) from main fabric, cut 2 (1 mirrored) from lining and 2 (1 mirrored) from interfacing. For the lining, cut on the line indicated in the pattern.
– Piece number 6 is the inner sleeve. Cut 2 (one mirrored) from main fabric, cut 2 (1 mirrored) from lining and 2 (1 mirrored) from interfacing. For the lining, cut on the line indicated in the pattern.
– Piece number 7 is the facing for the front. Cut 2 (1 mirrored) from main fabric and 2 (1 mirrored) from fusible interfacing.
– Piece number 8 is the neckline. Cut 2 (1 mirrored) from main fabric and 2 (1 mirrored) from interfacing.
– Piece number 9 is the outer collar. Cut 1 from main fabric and 1 from fusible interfacing, on the fold.
– Piece number 10 is the front lining. Cut 2 (1 mirrored) from main fabric.
– Piece number 11 is the sleeve crown. Cut 2 (1 mirrored) from the interfacing.
– Piece number 12 is the fusible interfacing piece of the sleeve hem. Cut 2 (one mirrored) from fusible interfacing.
– Piece number 13 is the collar piece without seam allowance. Use it to mark the fabric to know where to sew on the collar. You can use paper or cardstock.
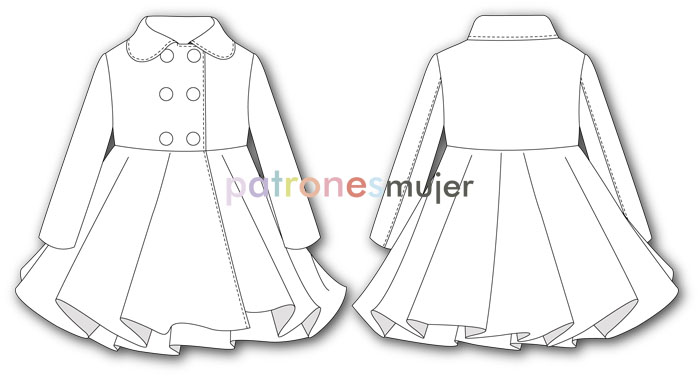
DIBUJO TÉCNICO:
RESULTADO: