CONSEJOS
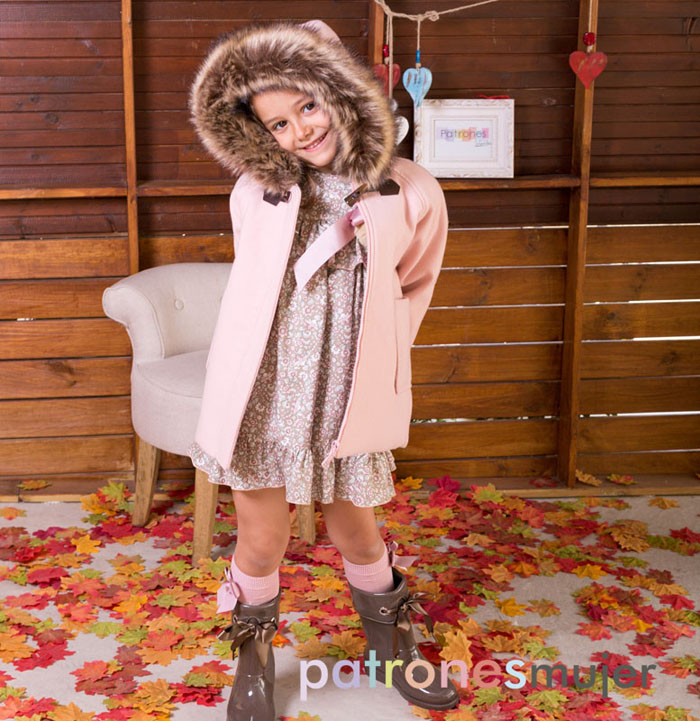
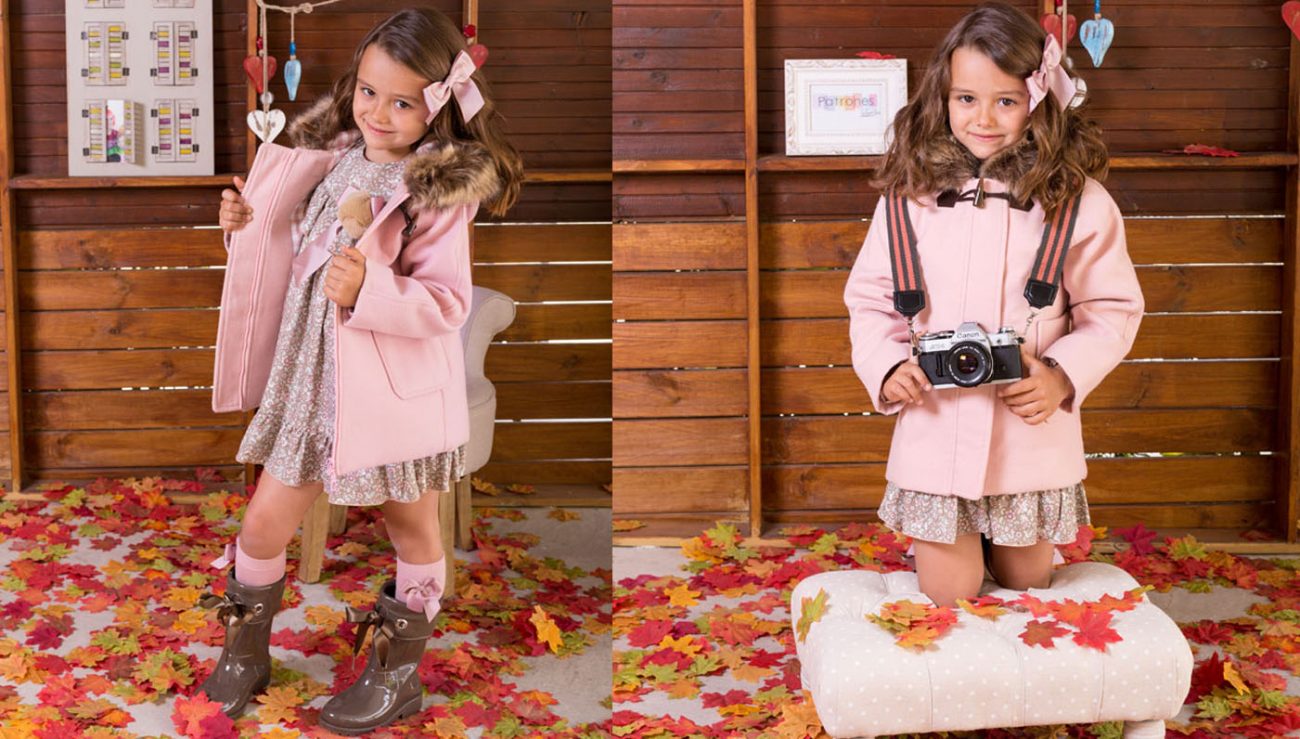
– Los tejidos recomendados para hacer la trenca son: Paño y muflón. El forro es algodón.
– Está en las tallas de 3 años a 12 años.
– Dificultad: Alta.
TIPS
– The recommended fabrics for the duffle coat are wool and mouflon. The lining is cotton.
– Available in sizes 3 to 12 years.
– Difficulty: High
VIDEO TUTORIAL
MATERIALES/MATERIALS
Género/main fabric:
1,10 m para talla 3-4 años/1,10 m for size 3-4 years
1,20 m para tallas 5-6 años/1,20 m for size 5-6 years
1,30 m para tallas 7-8 años/1,30 m for sizes 7-8 years
1,70 m para tallas 10-12 años/1,70 m for sizes 10-12 years
Forro/lining:
1 m para talla 3-4 años/1 m for size 3-4 years
1,10 m para tallas 5-6 años/1,10 m for size 5-6 years
1,20 m para tallas 7-8 años/1,20 m for sizes 7-8 years
1,40 m para tallas 10-12 años/1,40 m for sizes 10-12 years
Entretela/Fusible Interfacing:
55 cm para talla 3-4 años/55 cm for size 3-4 years
60 cm para tallas 5-6 años/60 cm for size 5-6 years
65 cm para tallas 7-8 años/65 cm for sizes 7-8 years
70 cm para tallas 10-12 años/70 cm for sizes 10-12 years
Cremallera con separador/Two-way zipper:
40 cm para talla 3-4 años/40 cm for size 3-4 years
45 cm para tallas 5-6 años/45 cm for size 5-6 years
50 cm para tallas 7-8 años/50 cm for sizes 7-8 years
60 cm para tallas 10-12 años/60 cm for sizes 10-12 years
2 Hombreras para manga raglán/2 shoulder pads for raglan sleeve
Pasamanería de Pelo/Fur: 70 cm
1 Botón de cuerno/Duffle Coat button
PATRÓN:
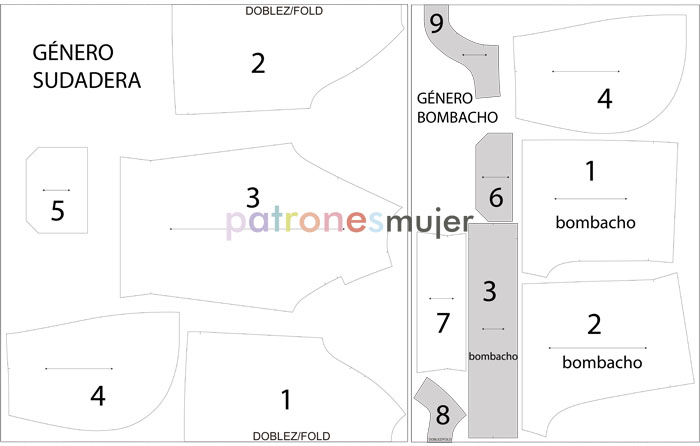
INSTRUCCIONES DE CORTE:
– La pieza 1 es el delantero, cortar 2 de género y 2 de entretela (encarados).
– La pieza 2 es la espalda, cortar 2 veces de género y 2 de forro (encarados). Para sacar el forro cortar por la línea del bajo.
– La pieza 3 es el canesú espalda, cortar 1 vez de género,1 de forro y 1 de entretela (el patrón está a la mitad)
– La pieza 4 es la vista del delantero, cortar 2 veces de género y 2 de entretela (encarados).
– La pieza 5 es la manga del delantero, cortar 2 veces de género y 2 de forro (encarados). Para sacar el forro cortar por la línea del bajo.
– La pieza 6 es la manga de la espalda, cortar 2 veces de género y 2 de forro (encarados). Para sacar el forro cortar por la línea del bajo.
– La pieza 7 es la tapeta, cortar 2 veces de género y 1 de entretela (encarados).
– La pieza 8 es la capucha, cortar 2 veces de género y 2 de forro (encarados).
– La pieza 9 es el corte de la capucha, cortar 1 vez de género y 1 de forro.
– La pieza 10 es el bolsillo, cortar 2 veces de género y 2 de forro.
– La pieza 11 es el forro delantero, cortar 2 veces de forro (encarados).
– La pieza 12 es el afinado bolsillo, cortar en papel o cartón.
CUTTING INSTRUCTIONS:
– Piece number 1 is the front. Cut 2 (1 mirrored) from main fabric and 2 (1 mirrored) from fusible interfacing.
– Piece number 2 is the back. Cut 2 (1 mirrored) from main fabric and 2 (1 mirrored) from lining. For the lining, cut on the line indicated in the pattern.
– Piece number 3 is the back yoke. Cut 1 from main fabric, 1 from lining and 1 from fusible interfacing.
– Piece number 4 is the front facing. Cut 2 (1 mirrored) from main fabric and 2 (1 mirrored) from fusible interfacing.
– Piece number 5 is the front sleeve. Cut 2 (1 mirrored) from main fabric and 2 (1 mirrored) from lining. For the lining, cut on the line indicated in the pattern.
– Piece number 6 is the back sleeve. Cut 2 (1 mirrored) from main fabric and 2 (1 mirrored) from lining. For the lining, cut on the line indicated in the pattern.
– Piece number 7 is the button placket. Cut 2 (1 mirrored) from main fabric and 1 from fusible interfacing.
– Piece number 8 is the hood. Cut 2 (1 mirrored) from main fabric and 2 (1 mirrored) from lining.
– Piece number 9 is the binding for the hood. Cut 1 from main fabric and 1 from lining.
– Piece number 10 is the pocket. Cut 2 from main fabric and 2 from lining.
– Piece number 11 is the front lining. Cut 2 (1 mirrored) from lining.
– Piece number 12 is the pocket piece without seam allowance. Use it to mark the fabric to know where to sew. You can use paper or cardstock.
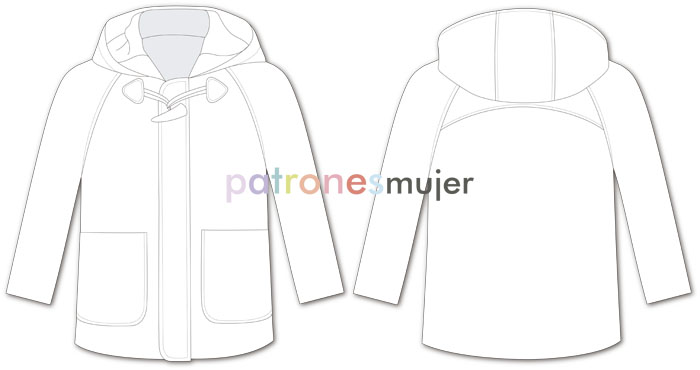
DIBUJO TÉCNICO:
RESULTADO: